Automated Test Sequence
On this page you will learn how to set up, run and modify the automated test script for cable testing.
Setting up the automated test sequence
Modify the init file
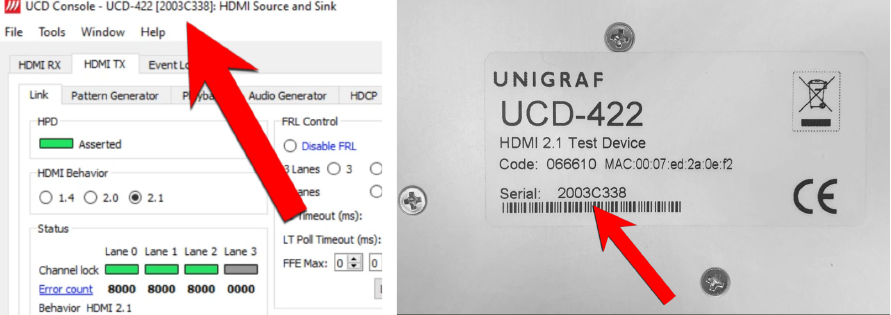
Firstly, you need to modify the init.tsi file. This is file is found in the folder provided you by Unigraf. Please, contact Unigraf for the latest version of the test files. In the init file you need to replace the sink and source device number with the one from the device you are using. You can check the number either from the sticker in the device or from UCD Console as shown below.
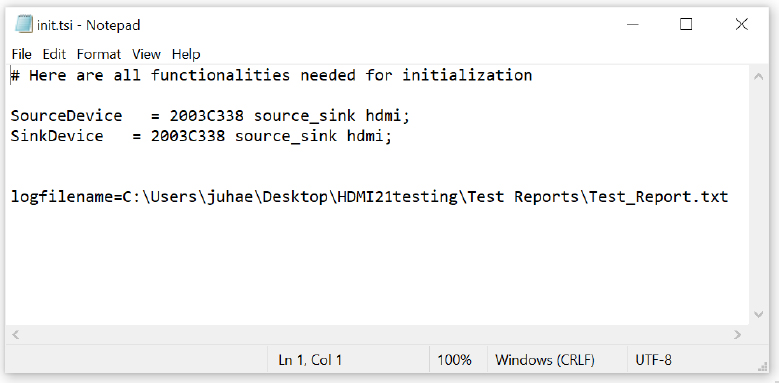
In the init file you can also set the folder test reports will be stored in. Copy the location of the folder and the name of the report in the init file as shown below.
Set up UCD-422
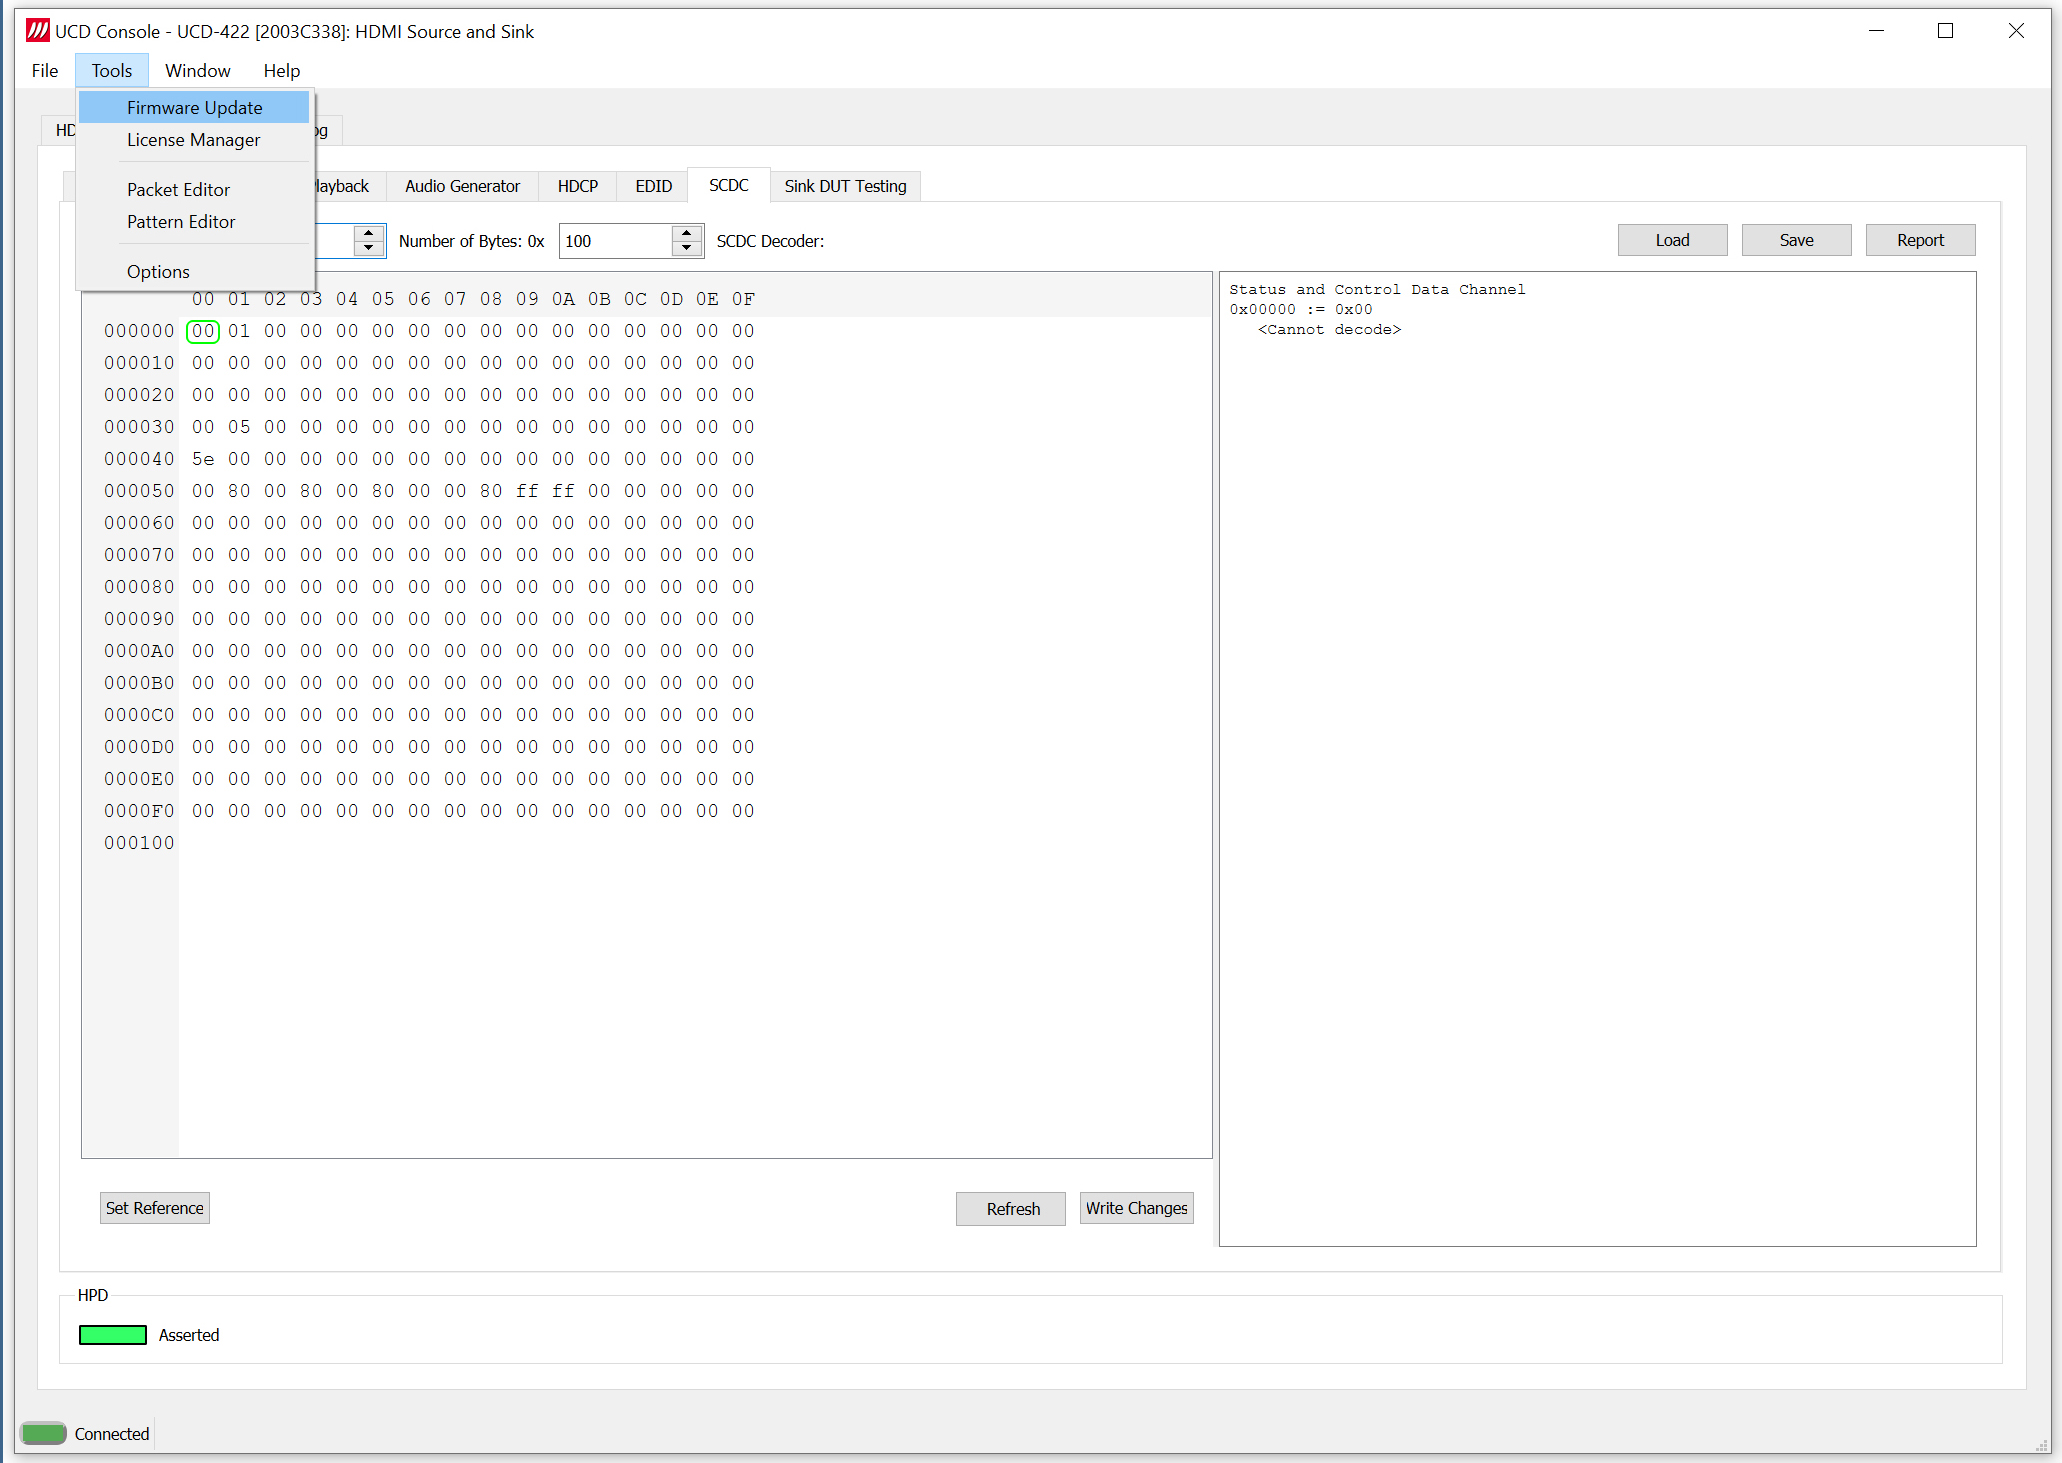
Firstly, you want to make sure that your device is running the latest Firmware. You can easily update the firmware by clicking Tools > Firmware update on UCD Console. By following the instructions you can quickly see if there is a new firmware available for your device and update it.
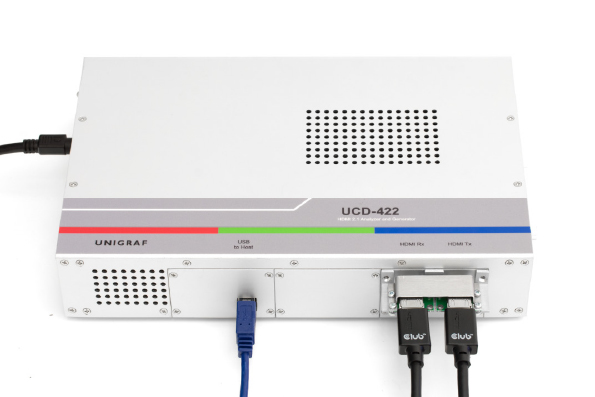
Secondly, for cable testing, you need to set up the device for loopback mode. This means connecting the cable from the HDMI input into the HDMI output. This setup is shown in the photo below. Please, note that only UCD-400 series products can operate as a sink and source simultaneously. When using e.g. UCD-323 for cable testing you would need another 323 or 301 device to act as a reference sink.
To Note
- UCD Console must be closed before running the automated test sequence
- Make sure the cable you are testing meets the testing requirements. Not all cables are able to transfer 8K video and some cables might not be compatible with HDMI 2.1.
Test coverage
The automated cable test sequence for HDMI 2.1 cables includes the following tests.
- Link training with 4 lanes and 12 Gbps lane speed
- FRL Lock status test
- FRL Lane errors test
- CRC test
- Video signal timing test for 8K@30Hz
Please, contact Unigraf for adding more tests in the test sequence.
Running the test sequence
Running the test sequence is simple: Open the Run test.bat file by double-clicking it and the test will run automatically. This is file is found in the folder provided to you by Unigraf. The video below shows how you can run the test and how the test runs automatically on the command line. The tests are designed for production line testing and instructions to plugin and remove cable are integrated into the test sequence. After the test has finished, you can either change the cable and continue testing or you can stop the test sequence by pressing STOP. A test report is automatically created and stored in the folder defined previously.
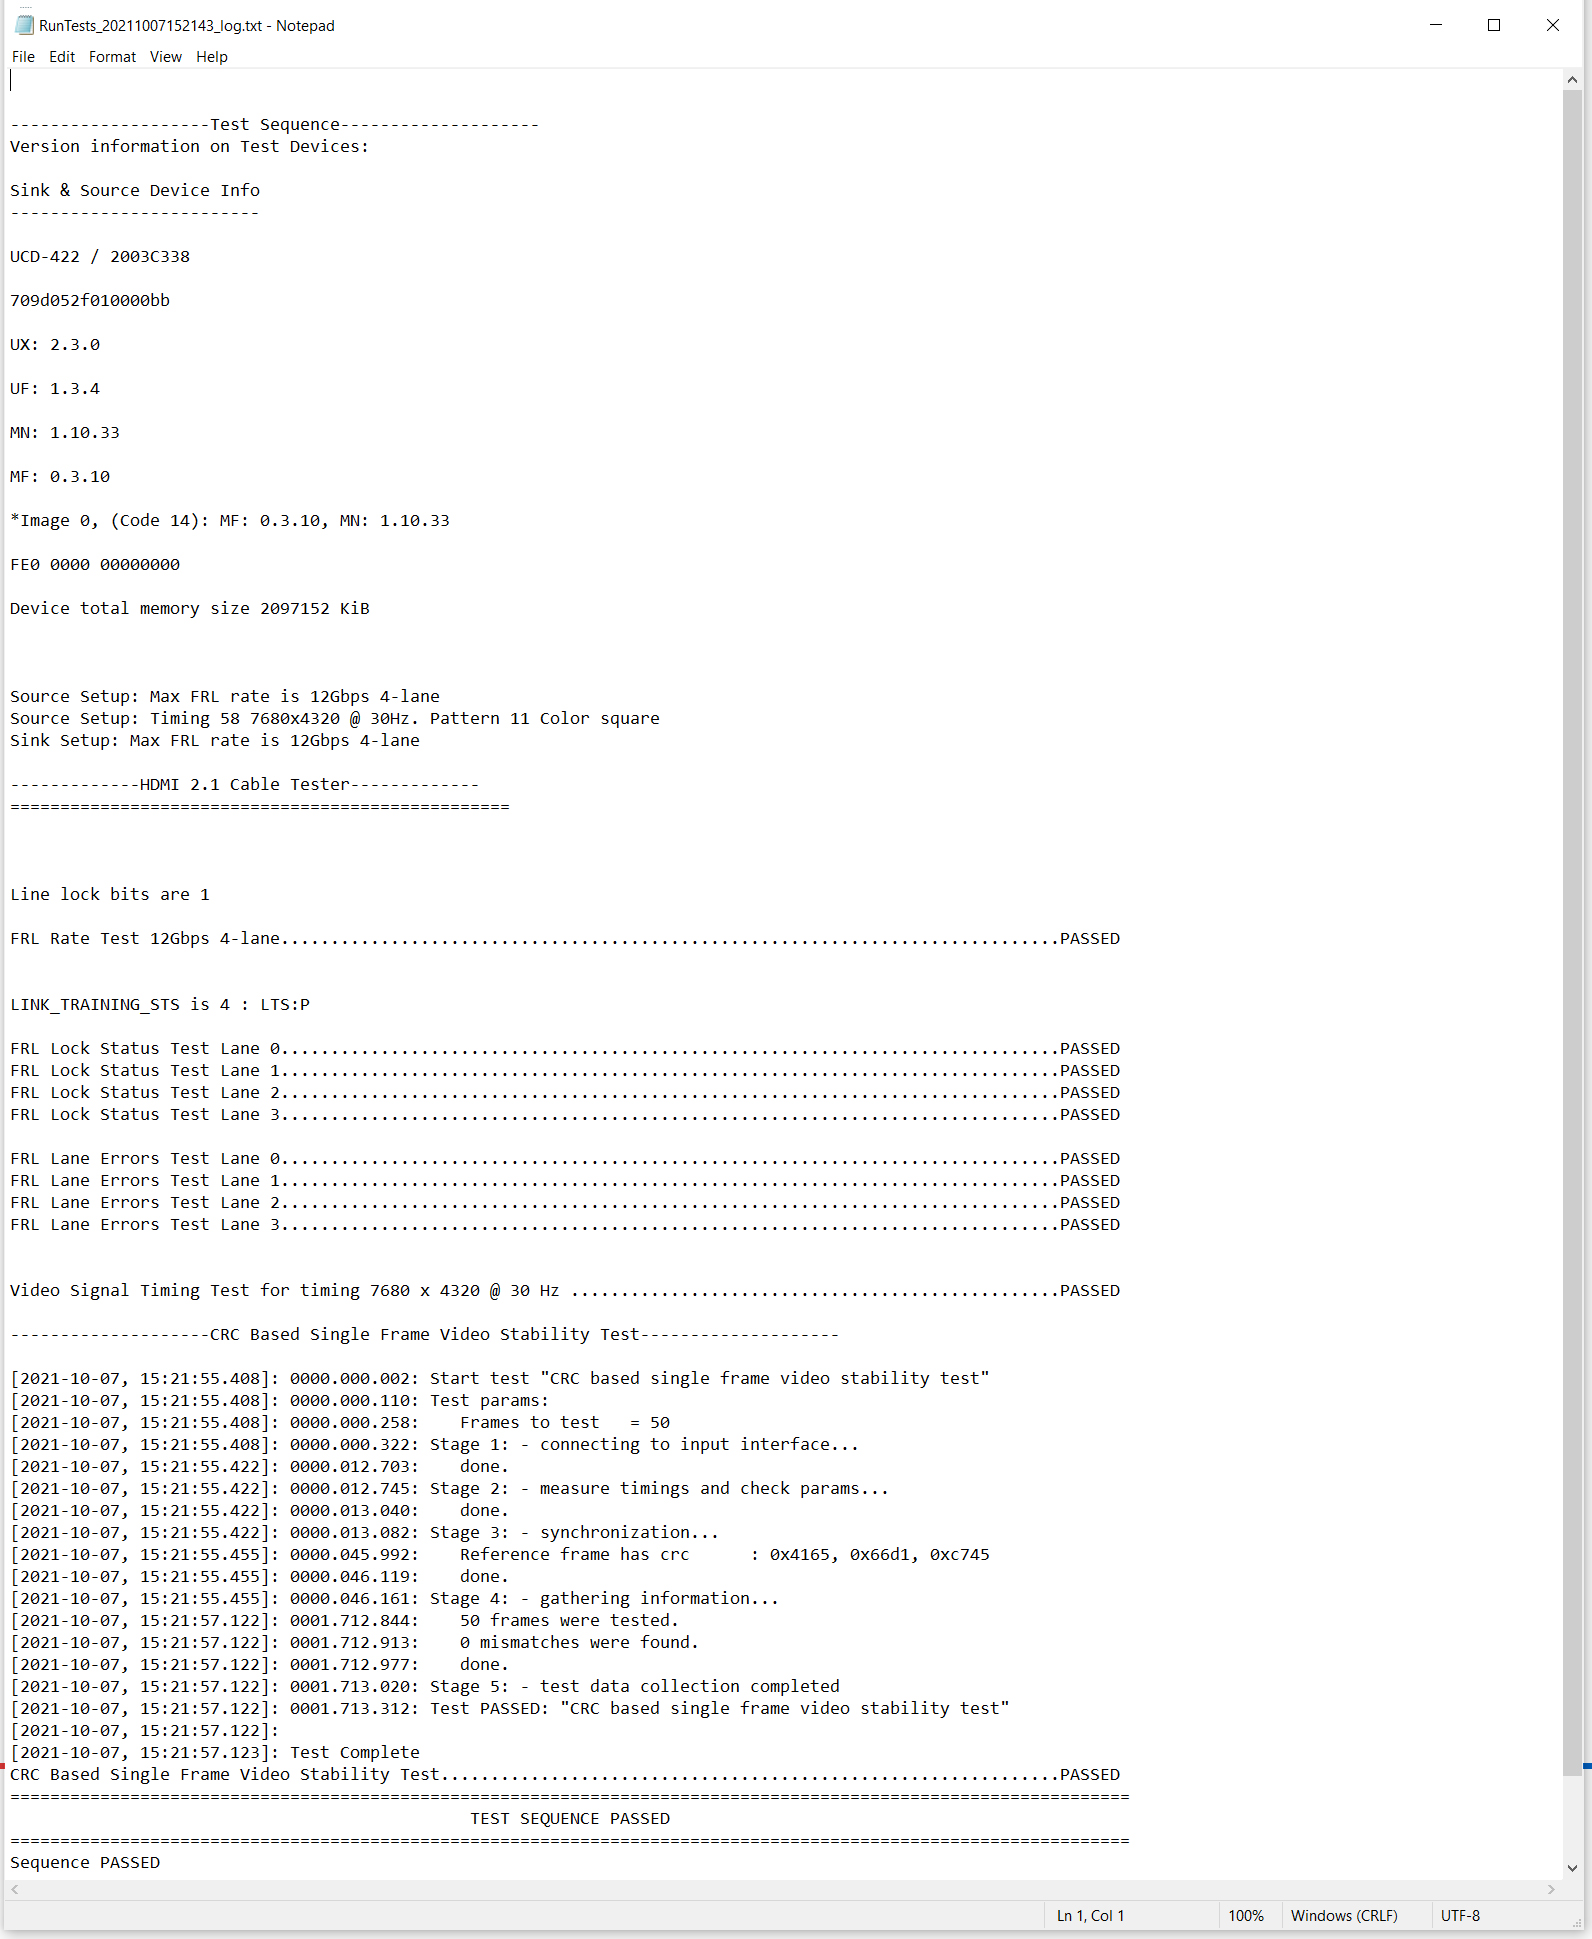
Test Reports
Test report is automatically created of the run sequence. It is stored in the predefined folder. For detailed instructions please refer to the first chapter of the page. The below image shows an example .txt report.